3. Uploading proofs and versions
3.1 Supported files
You can upload these file types: PNG, JPG, WEBP, PSD, PDF, MP4, WEBM.
- PDF files are the standard for packaging artwork. Multi-page PDFs are supported.
- Video files (MP4, WEBM) need a plan with video review. If your plan does not include it, you see: "Video uploads are not available on your plan…".
- The maximum file size depends on your plan. If a file is too large, you see: "File too large (max …)".
3.2 Upload a new proof
- Open the project.
- Select "Add", then "Proof". The "Upload files and folders" window opens.
- Drag files into the window, or click to browse.
- Optional: edit each file's name before uploading.
- Optional: choose a section for each file with its own "Select or add section" field.
- Select "Upload".
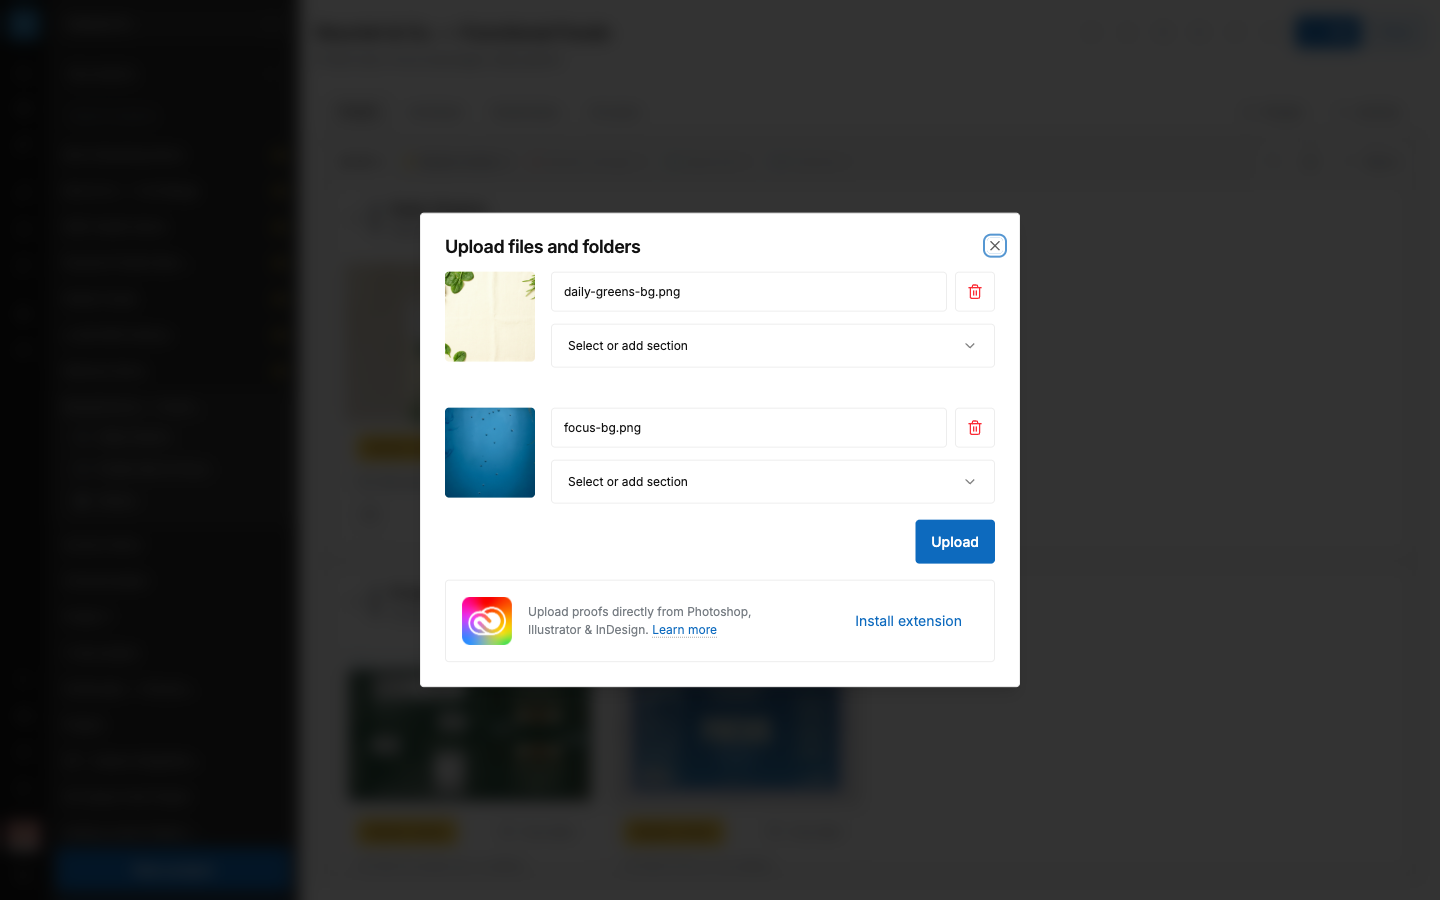
Other upload paths:
- "Folder upload" — upload the contents of a folder in one step.
- "Upload from Creative Cloud" — send artwork directly from Photoshop, Illustrator, or InDesign with the GoVisually Adobe extension. See chapter 11 for installation.
- The GoVisually Chrome extension can also send captures as proofs.
Each project can hold up to 100 proofs by default. Your plan may set a different limit.
3.3 Upload a new version
When the designer updates the artwork, upload the new file as a new version of the same proof. Do not create a new proof. This keeps the full history in one place.
- Open the proof card menu and select "Add revision". Or open the proof and use the version control in the toolbar.
- The "Upload new revision" window opens. The dropzone reads: "Drop new proofs or versions. Or click to browse files."
- Add the new file. While the file is analyzed you see "Getting file information…".
- Optional: edit the file name.
- Select "Upload".
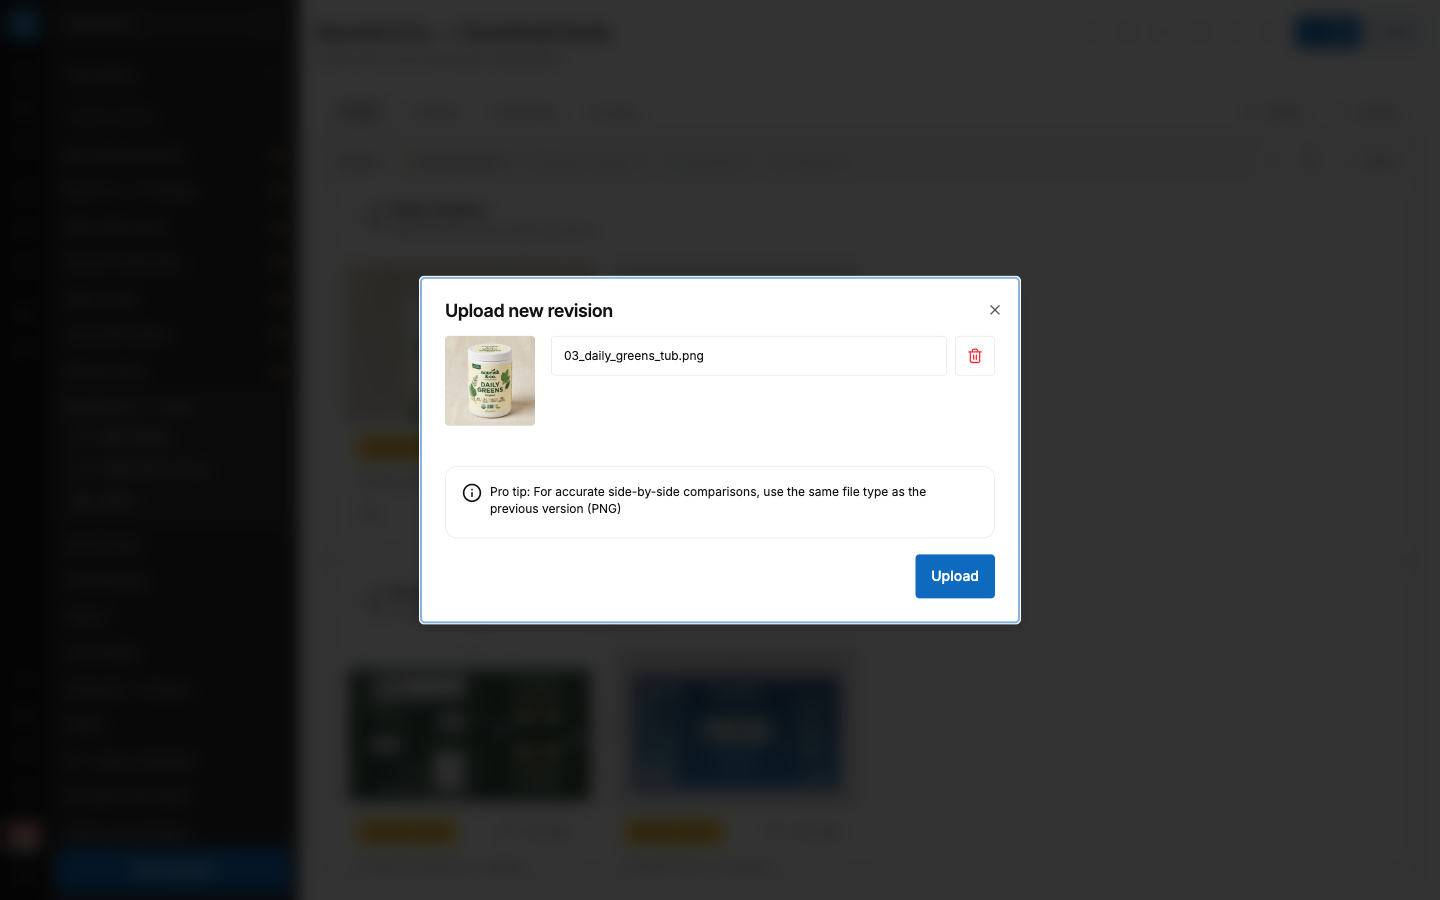
Tip from the product: "For accurate side-by-side comparisons, use the same file type as the previous version." If V1 is a PDF, upload V2 as a PDF too.
What happens after upload:
- The new file becomes the latest version. Its number goes up by one: V1 → V2 → V3.
- Review decisions start fresh on the new version. Everyone's status returns to Pending for the new version.
- The old version keeps its own comments and decisions. Nothing is deleted.
- Reviewers are notified that a new version is ready.
You cannot add a version to a finalized proof. Send the proof back for review first. See chapter 4.
Each proof can hold up to 100 versions by default. If you reach your plan's limit, the window shows a warning with a "Contact Support" link.
3.4 Version history
- Open the proof.
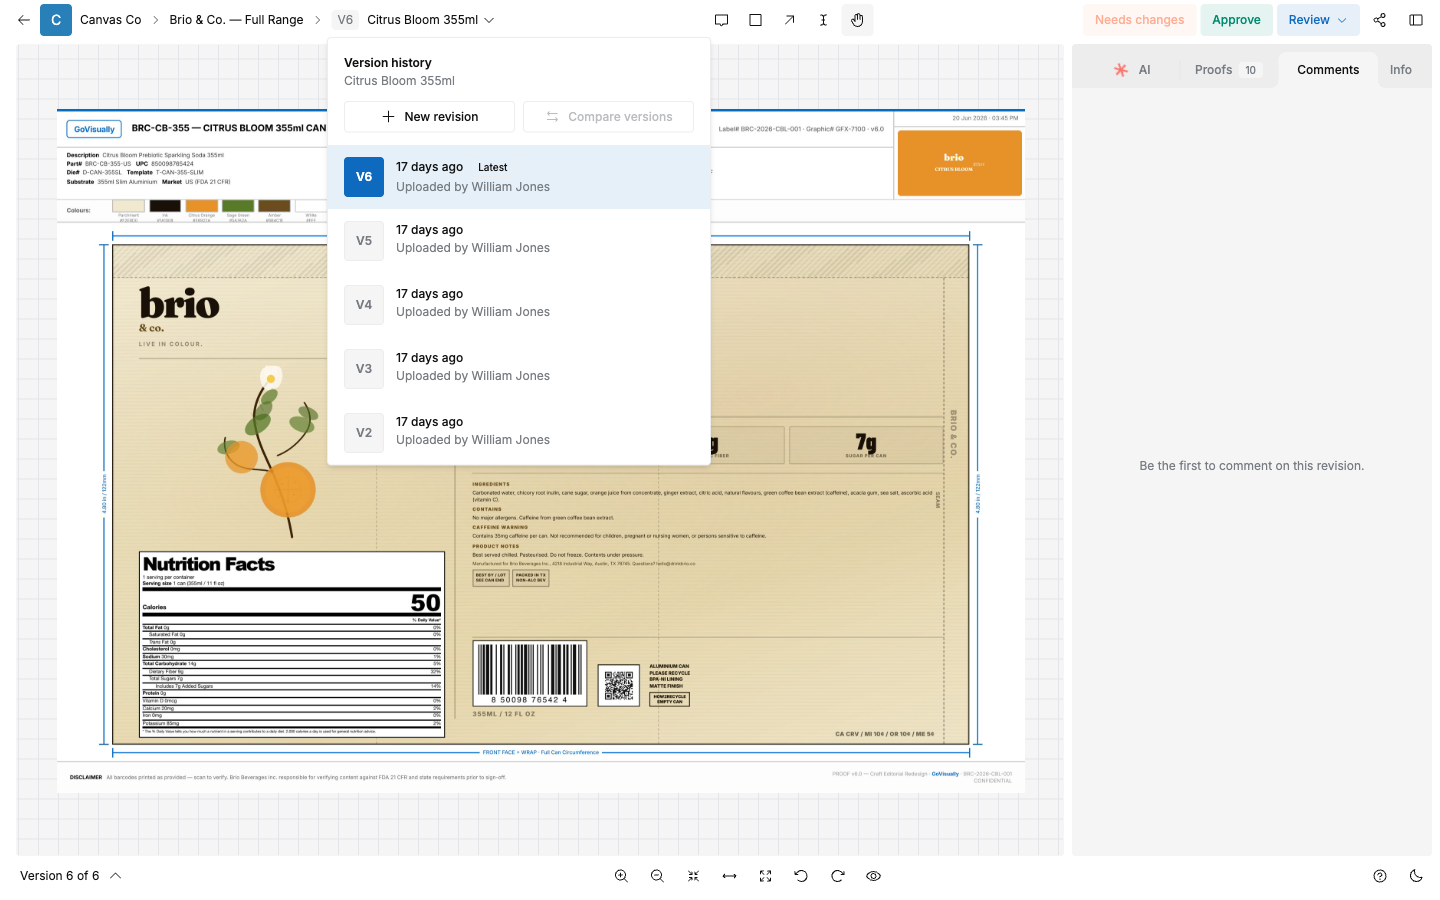
- Select the version control in the toolbar (for example "V3").
- The "Version history" panel opens. Each entry shows the version number and upload details.
- Select any version to view it.
3.5 Delete a version
- Open "Version history".
- On the version, select "Delete revision".
Rules:
- You cannot delete the only version of a proof.
- You cannot delete versions of a finalized proof.
- You cannot delete versions of an archived proof.
- If your plan includes the "Recycle bin", deleted versions can be restored from it. See chapter 11.
3.6 Download and export
Open a proof and use the actions toolbar:
- "Download file" — download the version you are viewing. Admins can restrict downloads; see chapter 5.
- "Export and print comments" — create a printable report of the proof and its comments.
3.7 Other proof actions
From the proof card menu: "Rename", "Share", "Compare", "Archive" / "Restore", "Delete", "Move to section", "Move to project".