2. Projects and sections
2.1 Create a project
- Open the "Projects" panel in the sidebar.
- Select "New project".
- Enter a name in the "Project name" field. The name must be 2 to 120 characters.
- Select "Create project".
- You see the message "Project created successfully".
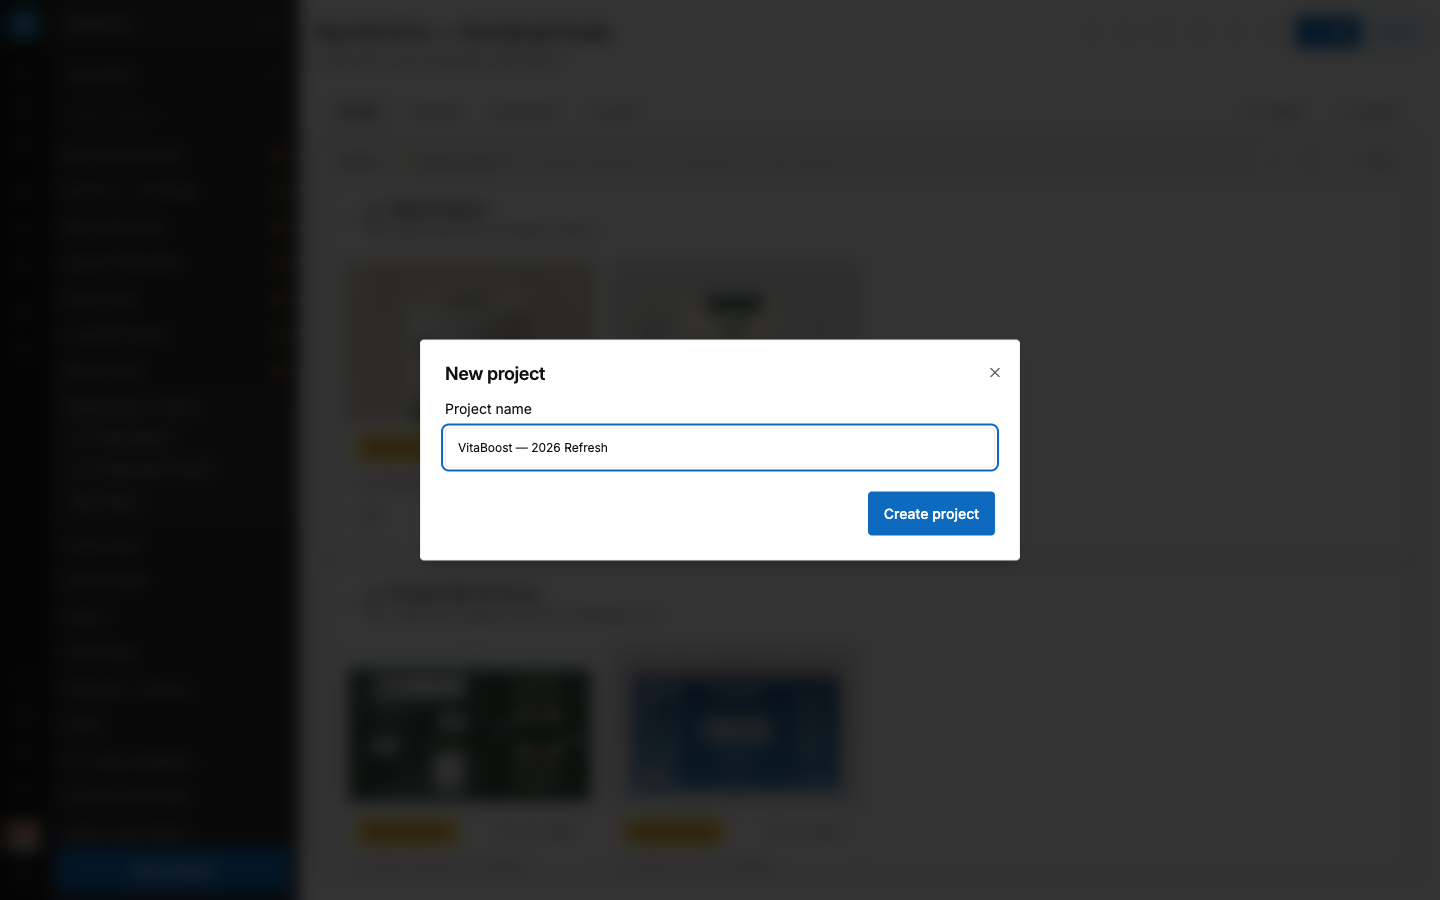
Suggested naming for CPG teams: include the brand, the product line, and the year. Example: VitaBoost — Carton Refresh 2026.
2.2 The project screen
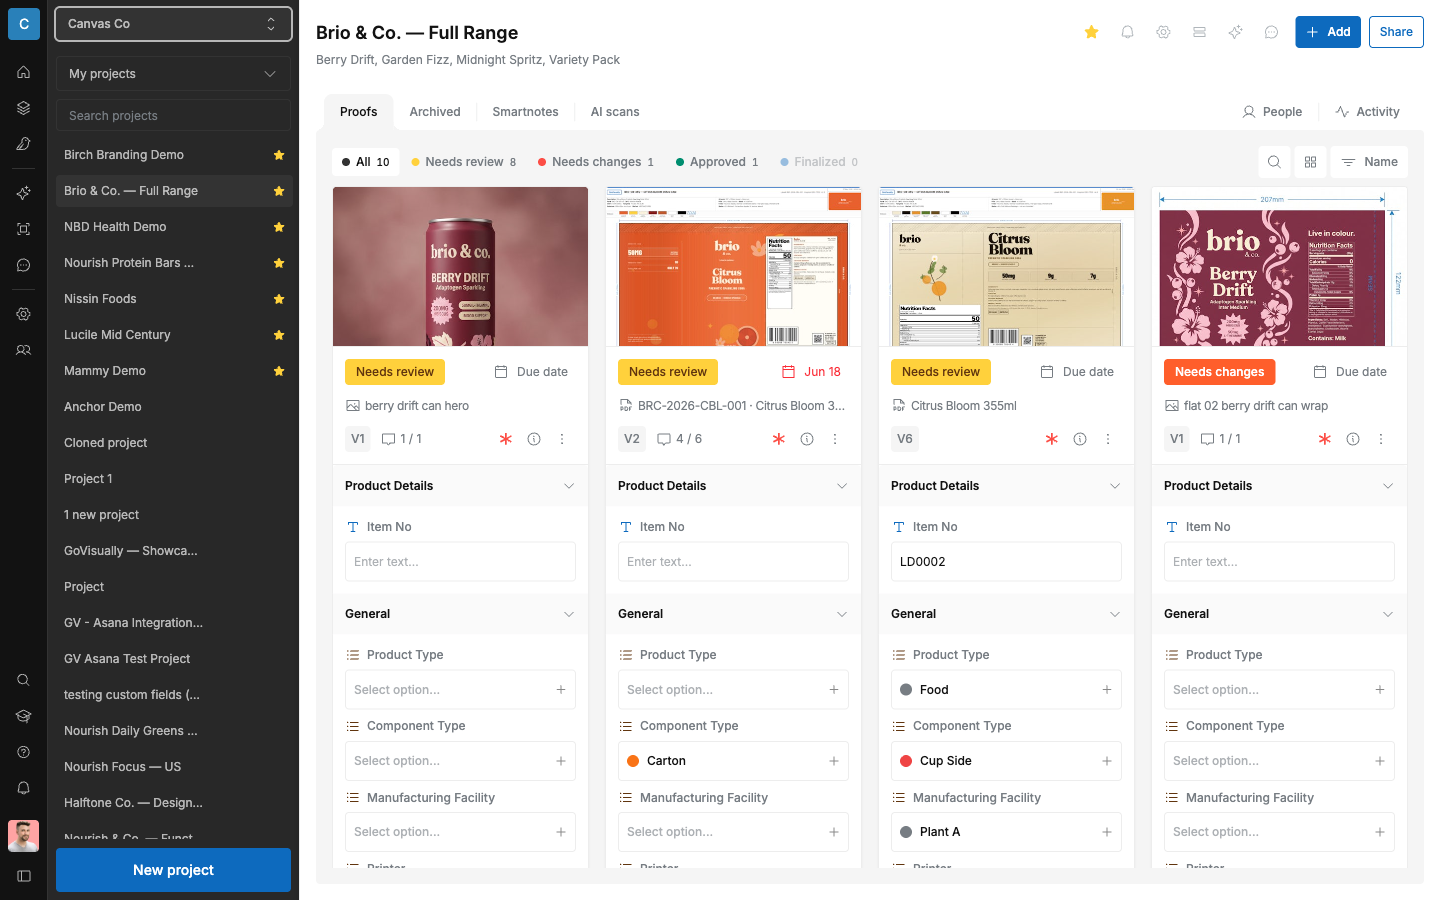
A project has four tabs at the top:
- "Proofs" — all active proofs, grouped by section.
- "Archived" — proofs that were archived.
- "Smartnotes" — project notes. See chapter 12.
- "AI scans" — AI check results for this project. See chapter 8.
Reviewers do not see the "Smartnotes" and "AI scans" tabs.
The project list panel has a filter with four options: "All projects", "My projects", "Favourites", and "Archived". Use the "Search projects" field to filter by name.
2.3 The "Add" menu
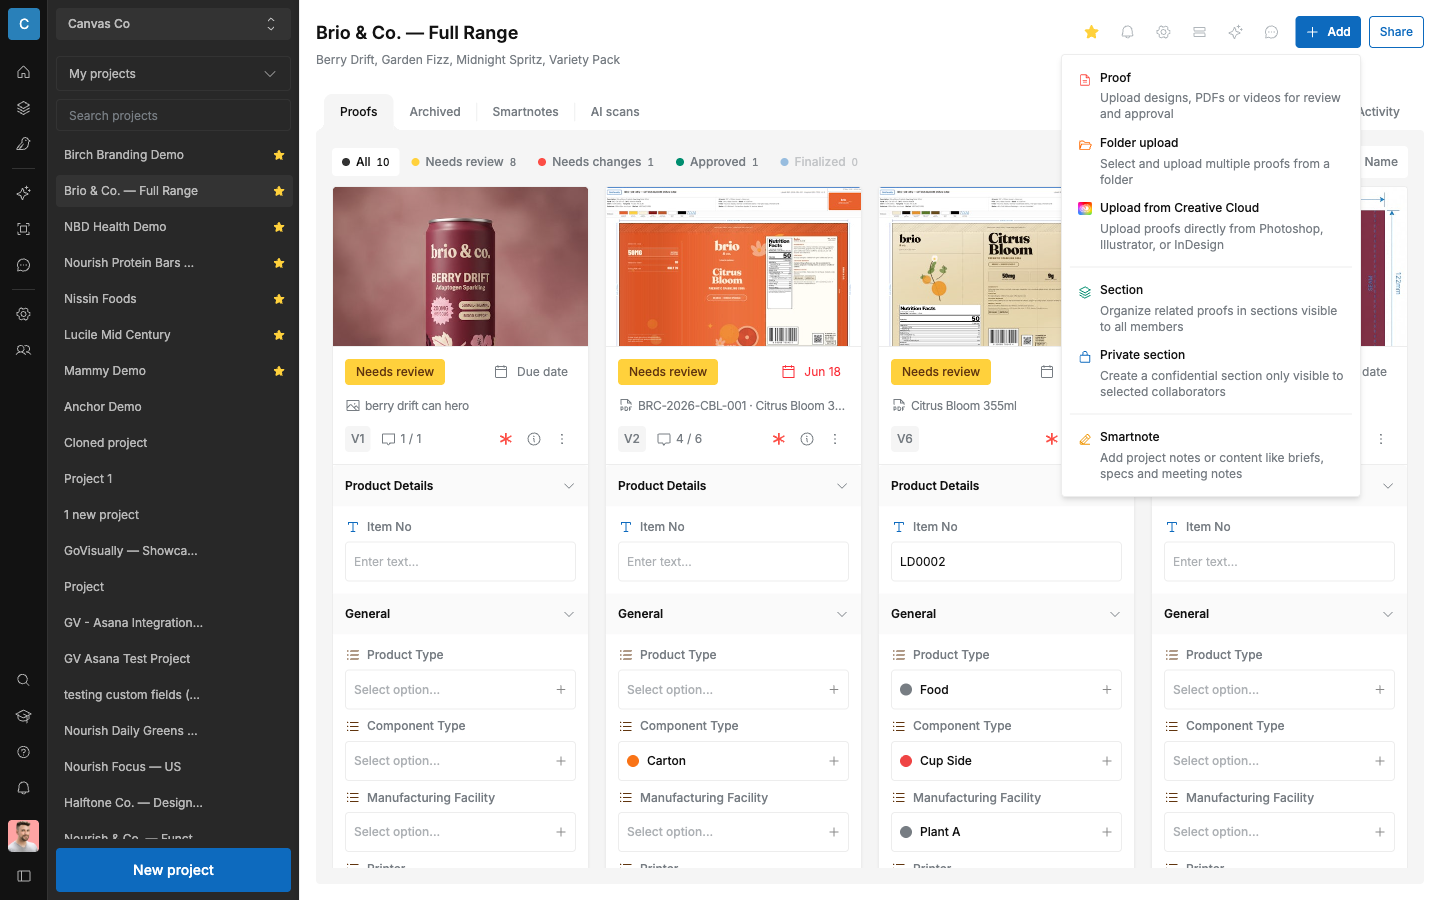
The "Add" button in the project header creates new content. It has five options:
| Option | What it does |
|---|---|
| "Proof" | "Upload designs, PDFs or videos for review and approval" |
| "Folder upload" | "Select and upload multiple proofs from a folder" |
| "Upload from Creative Cloud" | "Upload proofs directly from Photoshop, Illustrator, or InDesign" |
| "Section" | "Organize related proofs in sections visible to all members" |
| "Private section" | Create a confidential section that only selected members can see. Available on the Pro plan. |
2.4 Create a section
Sections keep large projects organized. A common CPG pattern: one section per SKU, or one section per market.
- Select "Add", then "Section".
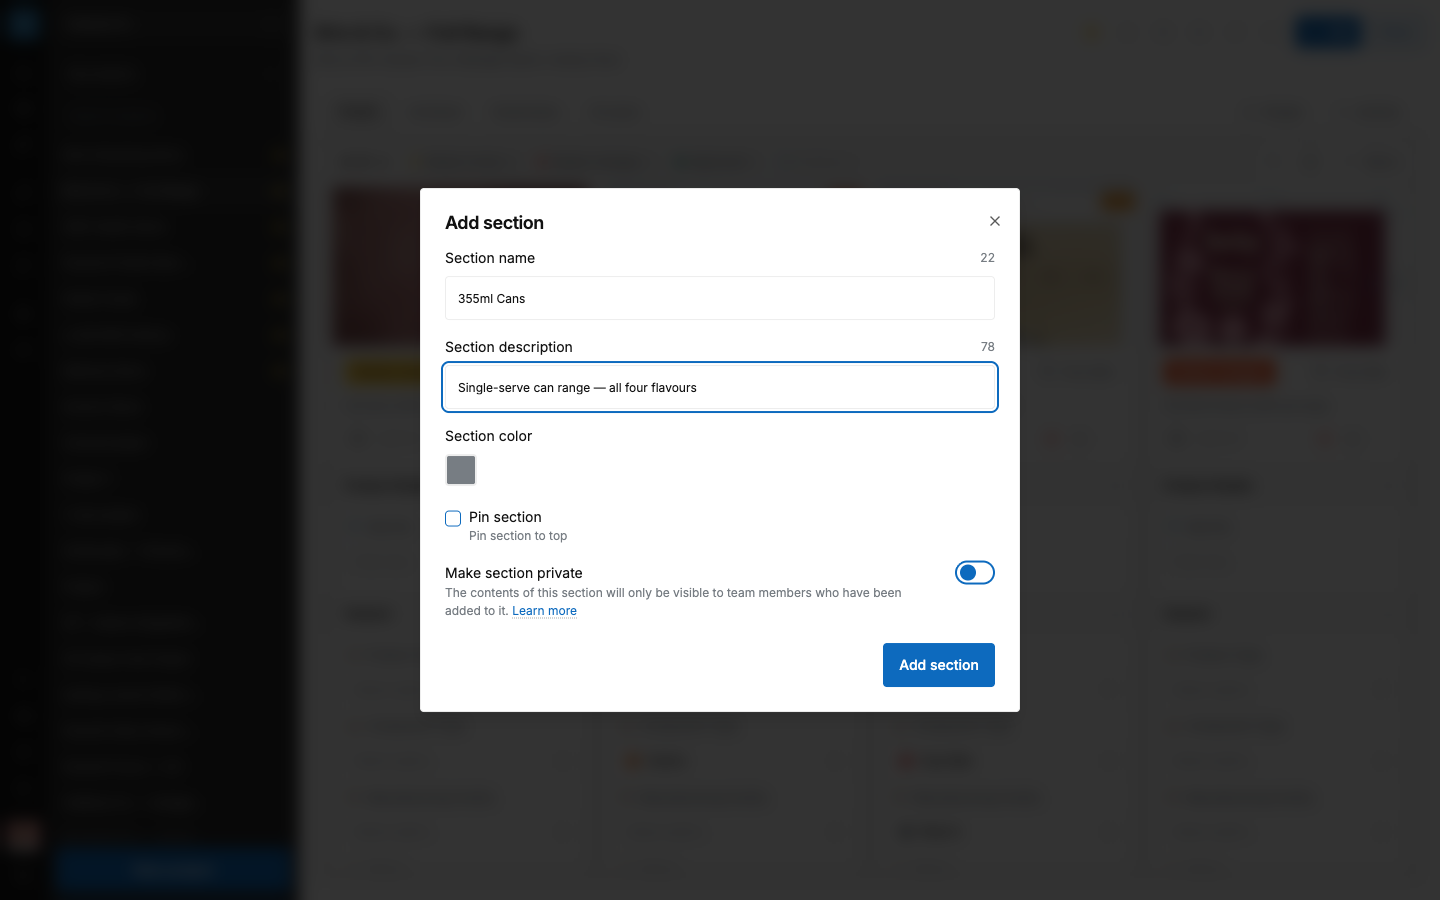
- Enter a "Section name" (maximum 32 characters).
- Optional: enter a "Section description" (maximum 120 characters).
- Optional: choose a "Section color".
- Optional: turn on "Pin section" to keep the section at the top.
- Select "Add section".
- You see the message "Section created".
To change a section later, open its menu and select "Edit section". You see the message "Section updated" after saving.
Proofs that are not in any section appear under "Others".
Section limits depend on your plan. If you reach the limit, you see: "You cannot add any more sections."
2.5 Private sections
A private section hides its proofs from everyone except selected workspace members. Use it for unreleased products or confidential SKUs.
- Select "Add", then "Private section". Or turn on "Make section private" in the "Add section" window.
- The helper text explains: "The contents of this section will only be visible to team members who have been added to it."
- Under "Select specific members who can view this section", add members in the "Team members" field.
- Select "Add section".
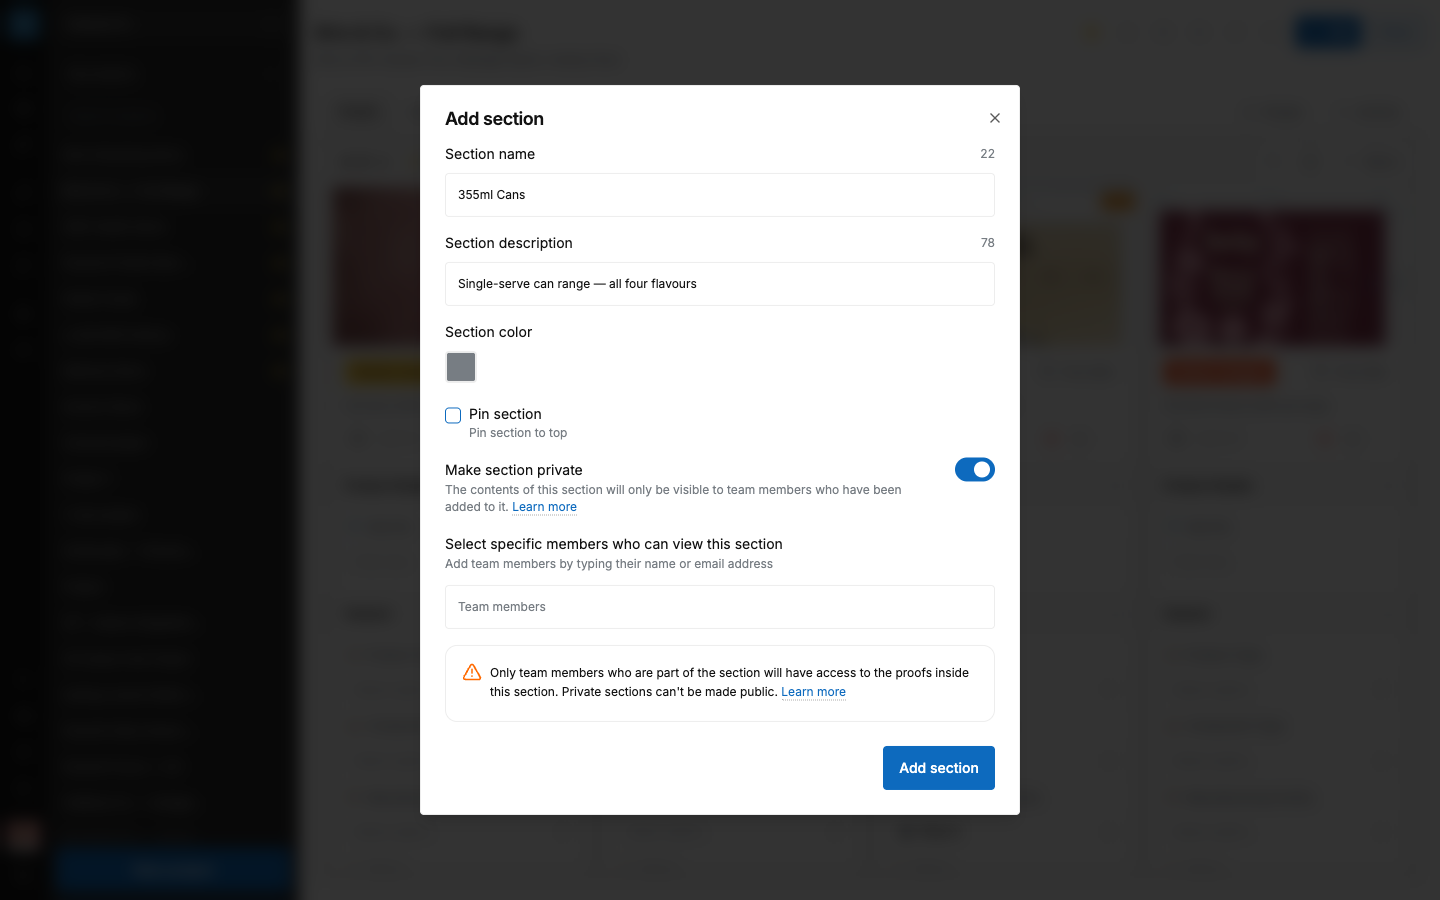
Important rules:
- A private section cannot be made public again. The window warns: "Private sections can't be made public."
- Reviewers never see private sections. Shared project links also exclude them.
- Private sections are a Pro plan feature. On other plans you see: "Private sections are available on the Pro plan. Please upgrade."
2.6 Move a proof
You can move a proof to another section or another project. Comments and versions move with it.
Move to a section in the same project:
- Open the proof card menu (the "…" button).
- Select "Move to section".
- Type in the "Type to search or create section…" field. Select a section, or create a new one.
Move to another project:
- Open the proof card menu.
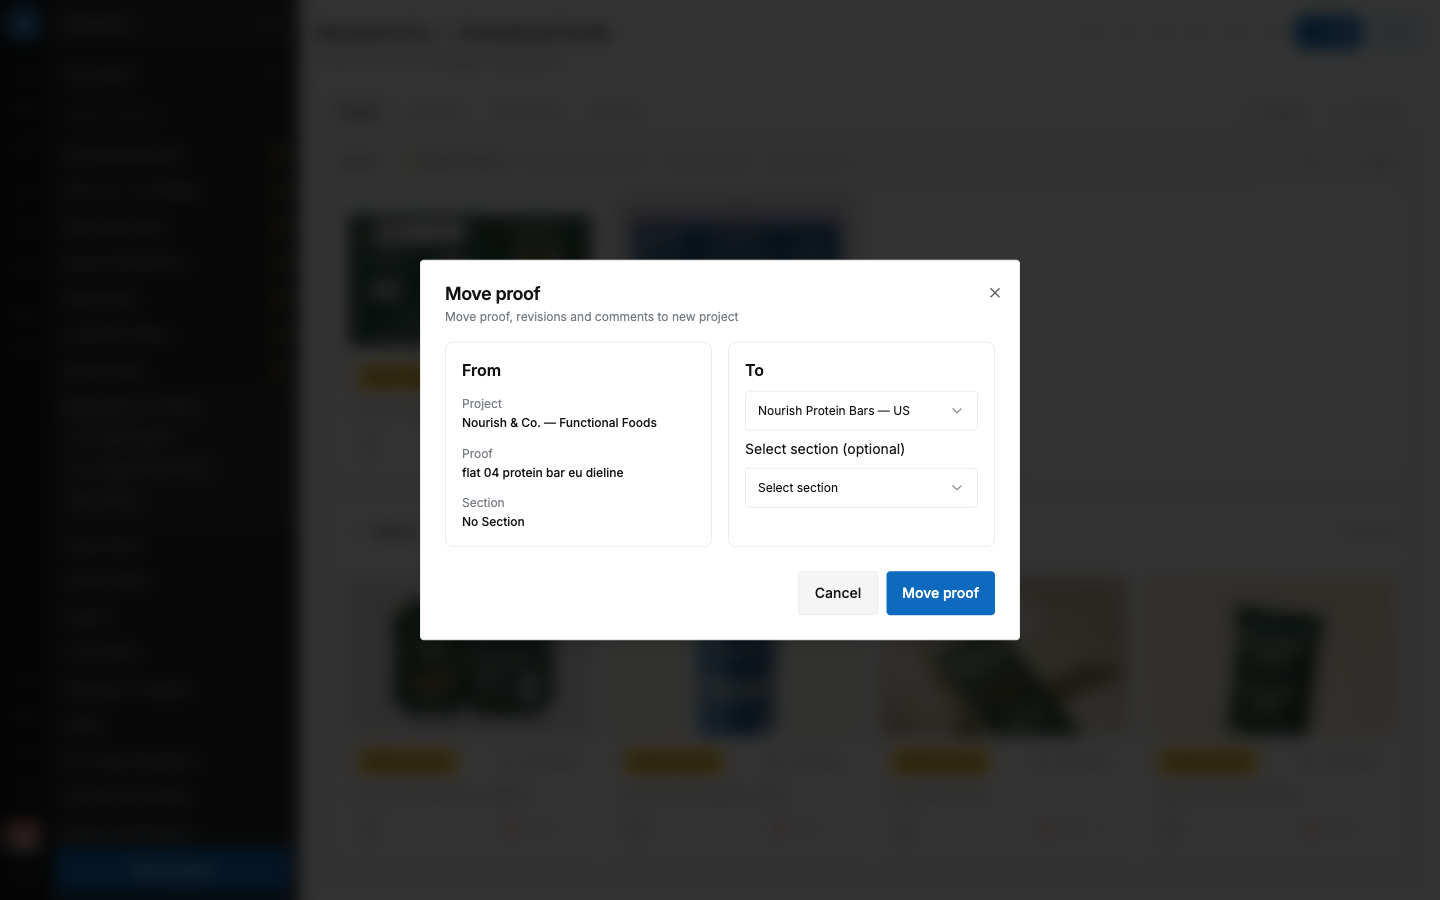
- Select "Move to project". The "Move proof" window opens. The subtitle reads: "Move proof, revisions and comments to new project".
- The "From" panel shows the current project, proof, and section.
- In the "To" panel, select the target project. Optional: use "Select section (optional)".
- Select "Move proof".
- You see the message "Proof moved successfully".
Moving proofs between projects is a plan feature.
2.7 Other project actions
From the project menu you can also:
- Archive a project and Restore it later.
- Clone a project.
- Delete a project. Deleted items go to the "Recycle bin" if your plan includes it. See chapter 11.
- Mark a project as a favourite. Favourites appear under the "Favourites" filter.
- Snooze notifications for one project.